Showing posts with label knitting pattern. Show all posts

Monday, February 4, 2013

Cunning Baby Hat

Oh, we do love Firefly.

After being commissioned to knit a Cunning Hat for a friend's brother's Christmas gift, I decided to try to make a tiny version since said friend's brother and his wife are expecting a baby this spring.

This hat ended up being about 17" in circumference with room to stretch. I don't know how that translates into baby sizes, but it fits our large stuffed goose.

Needles: four US size 6 DPNs (because DEATH to SEAMS)
Yarn: gold, orange, and maroon/burgundy Red Heart (Walmart) worsted weight. One skein of each is WAY more than you need for one little hat (WAY more than one adult and one little hat, actually), but Red Heart (and Walmart) doesn't really do little portions.
Gauge: 16 sts in stockinette = 4 inches on size 6 needles

1. Cast on 60 stitches in ORANGE using the Twisted German cast on method. This will result in a looser, more stretchy start than a normal cast on.

2. Distribute stitches evenly among three needles and join first round, being careful not to twist (this is the trickiest part of the DPNs (how to join and knit on DPNs)). Work 6 rounds in 2x2 ribbing.

3. Switch to stockinette stitch (knit all rounds), increasing 6 stitches evenly over the first round. 66 stitches total. Work 6 more rounds in stockinette. (13 rounds since cast on.)

4. Switch to GOLD yarn. Work two rounds in stockinette stitch. (15 rounds total.)

5. On 16th round, begin to shape the crown. *K9, K2tog* and repeat ** across. On next round, *K8, K2tog* and repeat. Continue to decrease the number of knit stitches by one each round until 6 sts remain. Cut a tail of about 6 inches and use a tapestry needle or a crochet hook to bring the tail through the active stitches in the direction you would knit another round, sliding needles out as you go. Pull tail tight and tie off.

6. For earflaps, pick up 14 stitches from the bottom edge of the hat with RED yarn using one DPN. With the outside of the hat facing you and upside down, tie the red yarn onto the first stitch on the right hand side of the needle. Knit first row, flip hat over. Knit second row (wrong side) and flip hat again. Row 3: Knit. Row 4: Purl. For remaining rows, knit in stockinette (knit on right side, purl on wrong side), and knit (or purl) last two stitches of each row together until 3 sts remain. Bind off.
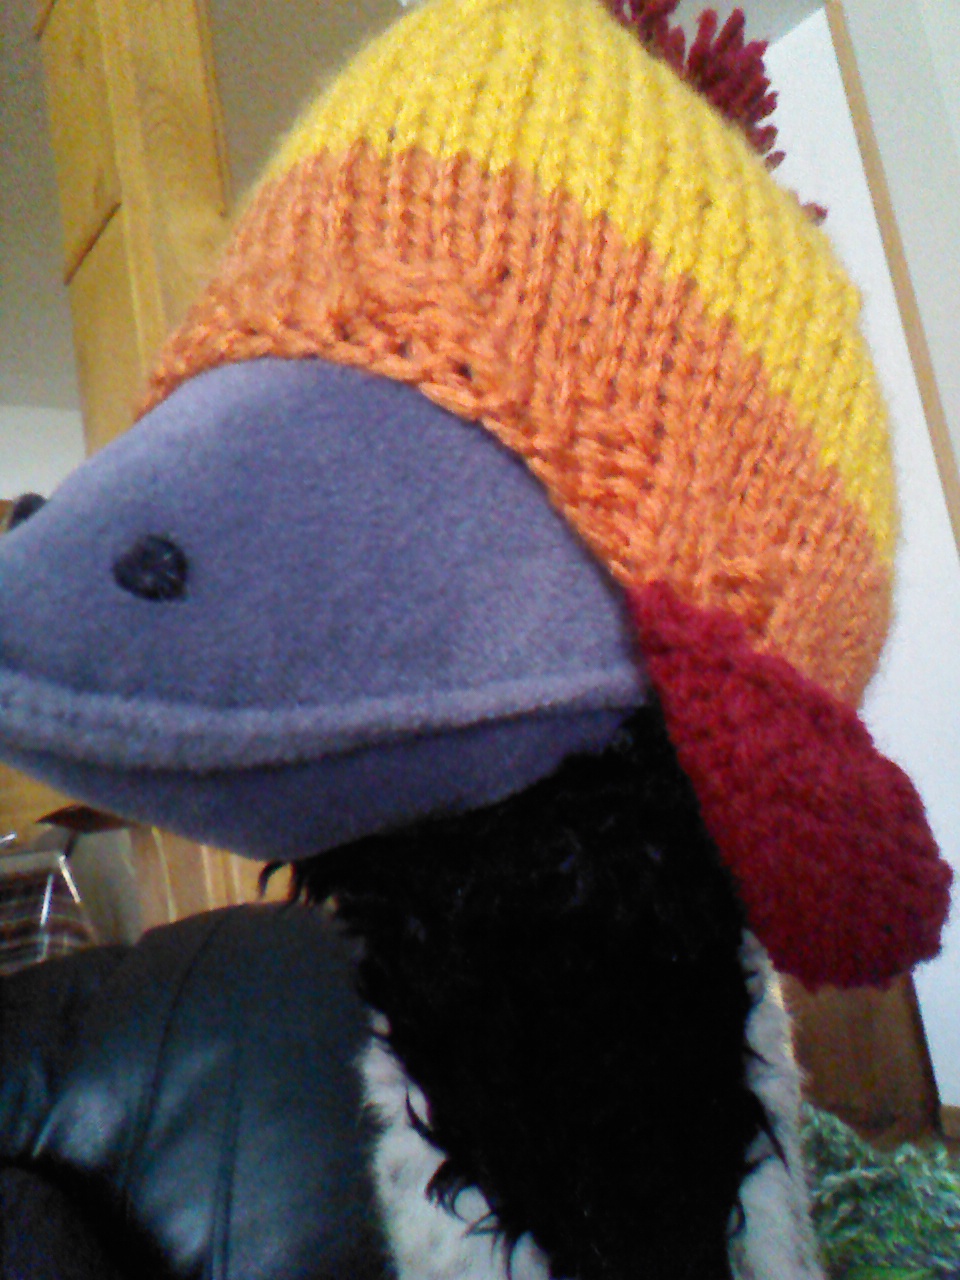
7. Weave any loose ends into the inside of the hat. Make and attach a red pompom to the top. (low-tech pom pom creation There are more sophisticated methods that turn out nicer, more even pom poms, but by the time I get to the embellishment stage, I'm done being finicky.)

Sunday, December 30, 2012

Seamless Mobius Cowl

1. I hate seams. I hate making them, weaving in their ends, and looking at them. So, while knitting something so large in the round is sometimes kind of a drag, I still prefer it to working flat and having more finishing to do.

2. This particular cowl is for a friend who happens to be a math teacher, so I thought the Mobius idea would be good. It is achieved by making sure the cast on row has a twist in it before beginning the first row of knitting. Somehow, I ended up with a double twist. Dunno how that happened. It looked like a single twist before I bound off...

3. I like the look and texture of seed stitch, but I think next time I'll do it in a basket weave stitch. Could also be done with cables or more decorative elements, but if you're looking for something easy to do with minimal concentration, I think seed or basket weave is the way to go.

4. The yarn and needle info is just what I used; use smaller needles and thinner yarn for a tighter knit. Adjust number of stitches accordingly.

Yarn: bulky weight, in this case self-striping. (If using worsted weight and a solid color, I'd recommend doubling strands as it will speed things up considerably.)
Needles: US 10 circular needles, in this case two cables together for a total cable circumference of about 36 inches. 
Gauge: 17 stitches on US size 10 needles = 4" in seed stitch.

Cast 255** stitches onto size 10 circular needles. I placed a marker every 100 stitches (and at the end of the round) to make counting faster and to break up the seemingly endless rounds, but markers are not strictly necessary.

Straighten out cable before joining and make sure there is one twist in the cast on row. (Still somehow ended up with a double twist. >-<) Carefully pick up and join, starting with a knit stitch. 

FOR SEED STITCH: *K1, p1*, repeat ** around. On second row, begin with a purl stitch. *P1. k1*, repeat around. Alternate rounds, knitting above stitches that were purled on the row before and vice versa. 

FOR BASKET WEAVE: *K3, P3*, repeat between **s around. Repeat round for a total of three rounds. On fourth round, *P3, K3*, repeat between **s around. Repeat for two more rounds. Alternate every three rounds; 3 rounds K3, P3; 3 rounds P3, K3.

When work has reached desired width, cast off in pattern. Weave in loose ends.

Seed stitch *accidental double* Möbius cowl. And a bit of my hair. Front-facing cameras are tough.

Cowl on me. Gotta love the tye-dyed T. If it fits in the 3rd trimester...
**I cast on 255 stitches to create a cowl that was 5 feet in circumference with the given gauge, worked in seed stitch. Or was supposed to. The math was correct, but the finished cowl was 6 feet in circumference. Now attempting 210 stitches in basket weave. Adjust number cast on to reflect your gauge and your desired circumference. ([How big around you want your cowl to be in inches] divided by [4]. Take that number and multiply it by [how many stitches it takes in your yarn and chosen pattern to make 4 inches].) For seed stitch, cast on an odd number of stitches. For a basket weave, cast on a number that is divisible by 6.